
Makingchocolateusingmolds
There are several types of chocolate available on the market, each with its own unique characteristics. Dark chocolate, milk chocolate, and white chocolate are the most popular varieties for molding. Dark chocolate has a rich and intense flavor, which is perfect for those who prefer a bolder taste. Milk chocolate is sweeter and creamier, while.

Molded chocolates, whether for serving on their own or as an edible
Microwave Method: Place the chocolate pieces in a microwave-safe bowl. Heat on a medium power level for about 30 seconds. Remove from the microwave and give the chocolate a good stir. Repeat this process, heating in short intervals and stirring in between, until the chocolate is smooth and glossy.

Learn how to make molded chocolate candies with this photo tutorial. It
Tips for Using Silicone Molds for Chocolate. - Choose high-quality silicone molds to ensure the best results. - Clean the molds thoroughly before use to prevent any residue from affecting the flavor of your chocolates. - Use a pastry brush to ensure the chocolate is evenly distributed within the molds. - Experiment with different types.
The History of the Chocolate Mold Skips Candies Blog
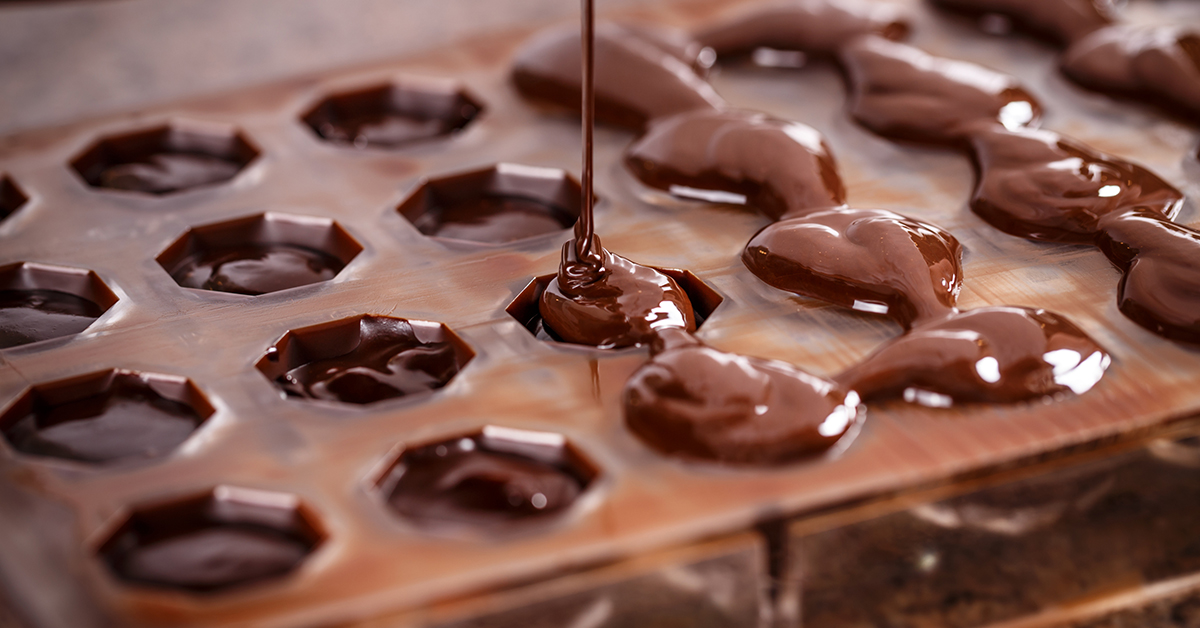
Filling the Molds. Fill each mold slowly with a squeeze bottle, spoon, or by pouring chocolate from a measuring cup. Using your palette knife or spatula, scrape off any excess chocolate into a clean bowl; it can be gently warmed and reused. When the back of the mold is smooth and even, gently tap the tray of chocolates on the countertop to pop.

I wasn't sure how these would turn out in the large mold, so I wasn't
To use Candy Melts candy with your mold, simply melt your candy in the microwave or in a double boiler (follow the instructions on the packaging for melting your candy). For easier filling, we suggest transferring your melted candy to a decorating bag so you can pipe the melted candy into the mold.

Lesson Creating Chocolate Bonbons Using a Mold
Using chocolate with silicone moulds is a fantastic way to make your own chocolates at home, as they allow for endless possibilities when it comes to shapes, sizes, and designs. Whether you're a beginner or a seasoned chocolatier, this step-by-step guide to using a simple silicone mould for chocolate-making will help you create a delicious.

How to Pick a Chocolate Mold Candy Making YouTube
STEP 1: Make the walls of your mold using the building blocks. Layout your models, flat bottom down, spaced apart on your work surface. Then, use the building blocks to create a wall around your models (the frame). Leave 2 cm clear around your models to make pouring the silicone easier.

How To Use A Chocolate Mold Blog Chocolate bar molds, Chocolate
Chill for a few minutes to allow candy to set. Fill each cavity with your filling of choice, but make sure it's room-temperature or cold—a hot filling could melt all your hard work. Leave about 1/8 inch below the edge, and then top if off with the rest of the melted chocolate or candy. Tap the mold to release any air bubbles, and chill to set.

Chocolate Bar Mold Quick and Easy Mold Making AB Crafty
Then, pour the melted chocolate into a plastic candy mold, and scrape the excess chocolate off of the top of the mold using a knife. Next, gently tap the mold tray on a flat surface to remove any air bubbles, and place it in the freezer for 5-10 minutes. Finally, once the chocolates are set and firm, remove them from the mold and dig in..

Chocolate Covered Oreo Molds YouTube
It is best to put the mold on a scale so that the same amount of chocolate is poured into each well or use a device that measures the amount that comes out. The mold should be left undisturbed so it can harden before being demolded. When molding, make sure the temperature of the molds is no higher than 79°F-81°F for milk and white chocolate.
How to make molds for chocolate praline? Savoury Trips
When you know you used the best, the praise you receive means even more. 3. Candy Making How-To Tip 1 - Melting - Microwave Guittard molding chocolate in 30-second intervals using microwave safe bowls, stir in-between to distribute the heat, in order to avoid scorching the chocolate. Keep chocolate at a constant temperature to produce a smooth.

Custom chocolate molds
Paint different details inside the chocolate mold using merckens colored candy coatings. You can purchase individual colors, or a Merckens rainbow mix bag if you only need a few chips of each color. If you're only melting a couple of chips to paint with, use a small bowl that is equivalent in size to the amount of chocolate you are melting.

HOW TO MAKE CHOCOLATE COVERED OREOS USING FLOWER MOLD! Christine Tith
Break the chocolate into small pieces and place them in a microwave-safe bowl. Microwave the chocolate in 30-second intervals, stirring in between, until it's completely melted and smooth. If you prefer, you can also melt the chocolate using a double boiler on the stovetop. Chocolate Molds Silicone - Set of 6 +Free Recipes eBook - Non-Stick.

Pack of 2 Wilton 12Cavity Silicone Swirl Candy Molds 4.98
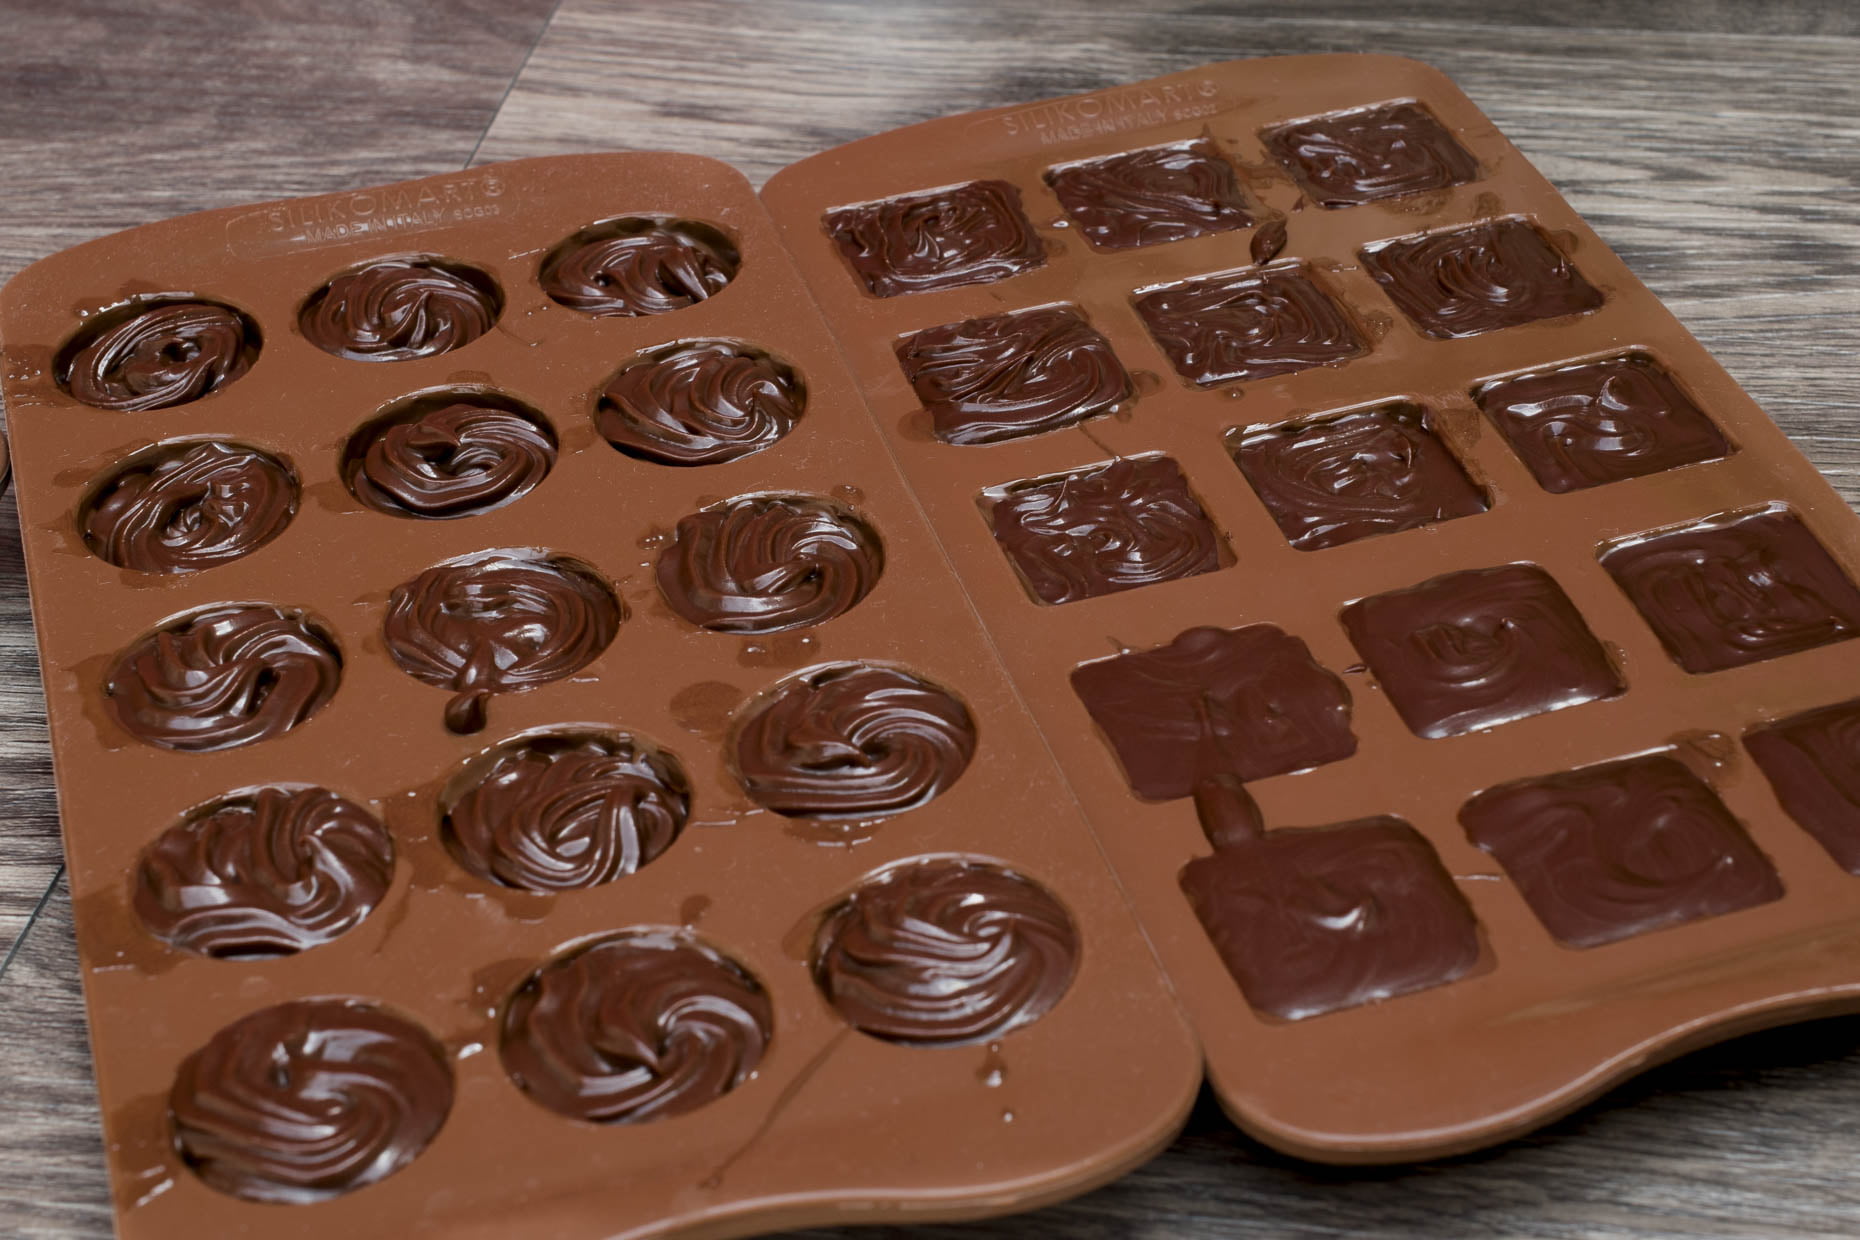
5. Fill mold with final layer of chocolate. Jessica Furniss. This step gets a little messy! Using your spreader, add a small amount of the melted chocolate to each mold, filling the mold completely. You'll want to fill each mold all the way up and then set the entire mold on a piece of parchment paper or paper towels.
4 Pcs Silicone Baking Molds for Chocolate, 6 Semi Sphere Mold Tray
Microwave Method: The microwave method is quicker and more convenient. Place the chocolate in a microwave-safe bowl and heat it in short bursts of 15-30 seconds, stirring in between each burst. Be cautious not to overheat the chocolate, as it can scorch or seize.

Custom Chocolate Molds Pastry Arts Magazine
Microwave the chocolate in short bursts at half power for about 10 seconds. Stir with a spatula between sessions until the chocolate is nearly melted. Next, mix the melted chocolate with the rest of the reserved chocolate. Keep using short microwave bursts until the mixture is smooth and uniform.
